I’ve been wanting to start up a blog to keep track of my ideas and share a little bit back with the community that’s helped me get to where I am. Going from helpdesk, sysadmin, networking to a security professional, I don’t believe I would have been able to accomplish as much as I have without the amazing repository of knowledge known as the internet. So with this post I start yet another blog amongst the litany of blogs with which I’ll humbly add to the ever-growing repository of knowledge. And what better way than to start than writing up how I was able to host this blog for free?
From my experience the word free on the internet usally comes associated with a slew of unwanted ads or some sort of catch in order to generate revenue and offset the very real cost of hosting any type of data. While there are many cheap ways to host a website out there. Why pay for something that you can legitimately have for free? But before we go any further, I suppose I should lay out a few disclaimers.
This instructional would work great for anybody who wants to host a simple web page that will be used for static websites such as blogs, landing pages, resumés, portfolios, proof of concept pages, etc… If you’re needing to manage things such as e-commerce pages, custom forms for data gathering and smtp capabilites - that is outside the scope of this article and you’ll most likely need something more robust than anything a ‘free’ host could provide.
If you are beginning to panic about the term ‘static website’ - NO I’m not going to force you to code your blog in pure HTML from the ground up. We’re going to be using GitHub Pages with Jekyll. Jekyll is a simple static site generator. Your posts will be in markup format which can be edited in any text editor. While you won’t have the luxury of a full-blown CMS and wysiwyg editor like wordpress, you also won’t have all of the bloat and security issues that come associated with most CMS, meaning you won’t have to constantly maintain and update that cms, plugins, and database to prevent malicious actors from taking over your website. Which can lead to trashing your reputation, blacklisting your domain, or running up hosting charges by using your web server as a staging ground for e-mail spam or as a C&C server.

Enough Talk, lets get to the good stuff.
How to:
Recap: We will be hosting on github pages, which will issue you a website name such as https://username.github.io - I’ll go into how you can link up your own custom domain including a free SSL Certificate which will allow you to use https so you can shed the “github.io” and give your website a bit more of a professional touch in a later post.
Pre-requisites
GitHub Account
- If you don’t have one go create one, it’s free!
- Remember your default site url will be <div style="display: inline">https://GITHUBUSERNAME.github.io</div> if you have a custom domain you’ll be using this won’t matter, otherwise keep this in mind when creating your account.
Step 1 - Creating our Website
We are like dwarfs sitting on the shoulders of giants. We see more, and things that are more distant, than they did, not because our sight is superior or because we are taller than they, but because they raise us up, and by their great stature add to ours.
In order to get going quick we will be utilizing one of the many free templates out there instead of creating one from scratch. If you would like to build one from scratch to learn HTML, CSS, Ruby, Jekyll and the other technologies that it takes to get a site going there are many great tutorials for that, which I encourage you to follow if you want to learn!
But for now don’t be ashamed to get a little help of those that have come before us. Let’s go ahead and utilize a clean free dark-theme Jekyll Clean Dark. On this page go ahead and click on fork
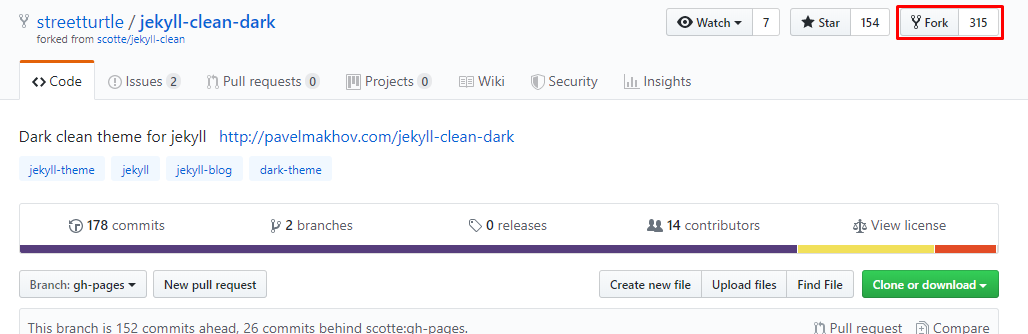
It’ll take a moment to copy the project into your github account.
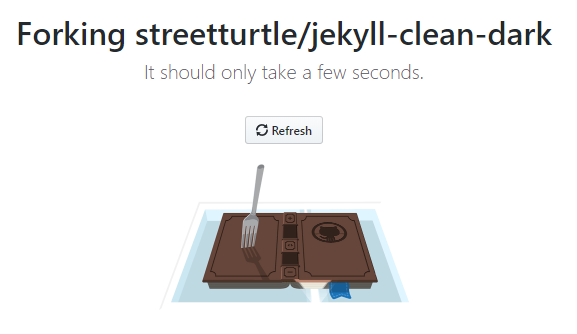
Once it is done forking, let’s rename the repository by clicking on settings.
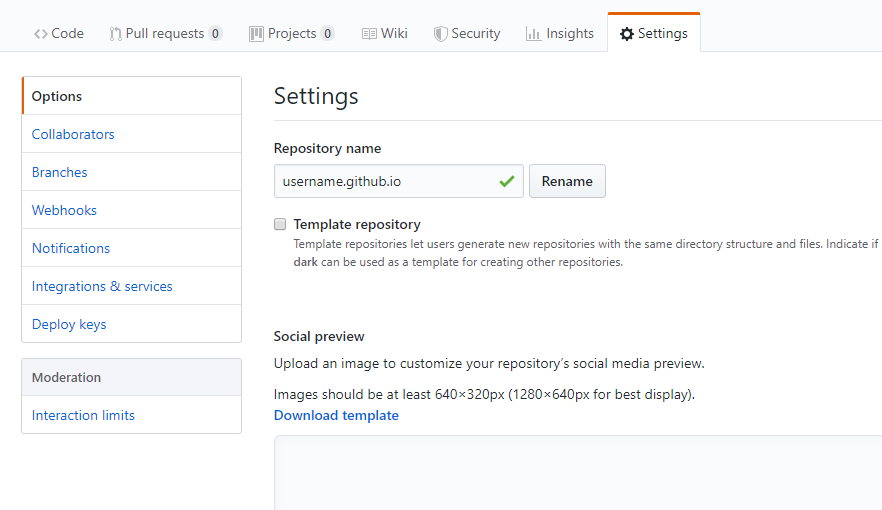
Go ahead and rename it to username.github.io replace “username” with your own username.

Now click on the code tab and then click on _config.yml

Click on the pencil to edit the file, and we’re going to edit a few lines.
* Line 3 type in the name of your blog
* Line 7 replace the url: field with your url, for now it will be https://username.github.io - remember put in your username
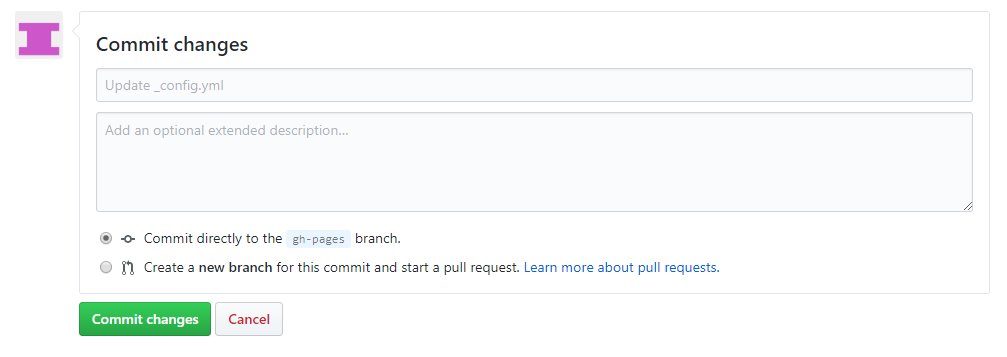
* Line 11 replace '/jekyll-clean-dark' with ''Feel free to change any of the other fields, as they are self explanatory. If you want to play it safe, leave as is. When you are done delete the last line which is blank then scroll down click on commit changes.
Once you have done this your website will be done! Go ahead and open a new tab in your browser and go to https://username.github.io
The posts you see on the page are all in the _posts folder. Go back to your github repository and click on the code tab then click on the _posts folder.
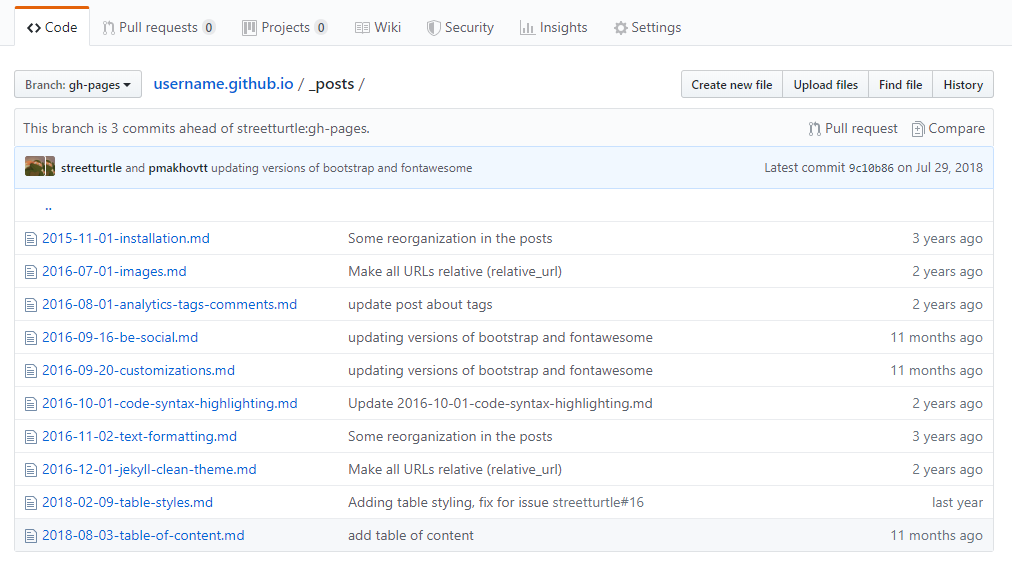
Click on any of the posts and edit it like you did the _config.yml file. Once you commit it, github will take a few minutes to re-generate your website before you can see the changes reflected.
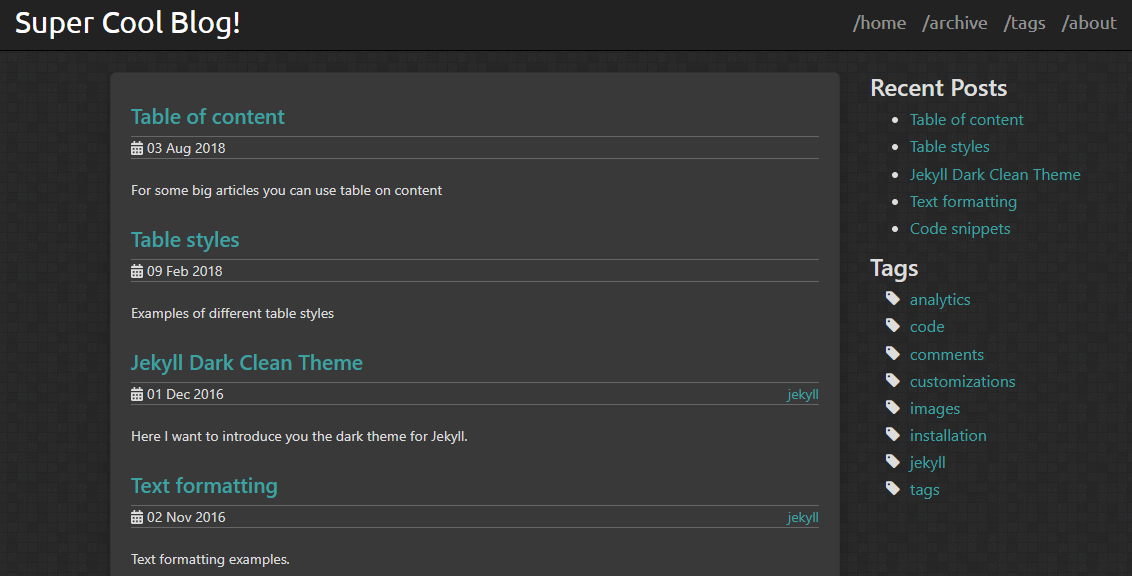
Edit, delete or create posts in the _posts folder and see how it reacts on your website. Keep in mind, I chose this template not only because it has a clean design but because the sample posts are actually quite helpful. Read them at least once before deleting. Or don’t - up to you!
There are many free templates out there and each is a little different so don’t be afraid to expirement!
I will be posting additional customizations such as a custom domain and how to locally edit your website from your computer later on.
Until later! - Kevin